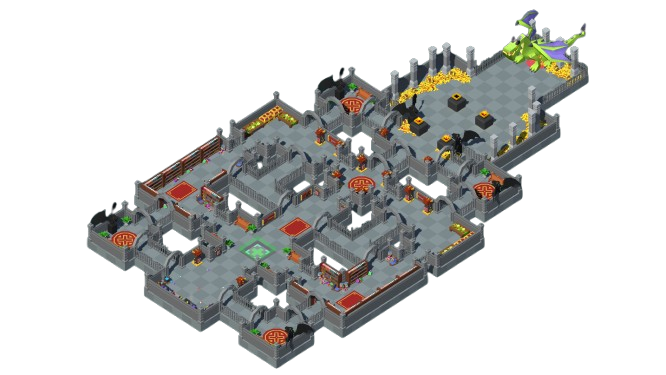
Enter Dragon's Dungeon and fight monsters until you get enough strength to face the mighty Dragon. Once dragon is defeated, pick a new hunter and venture deeper into the dungeon.
If you are wearing Epic gear, you can get Epic Gems.
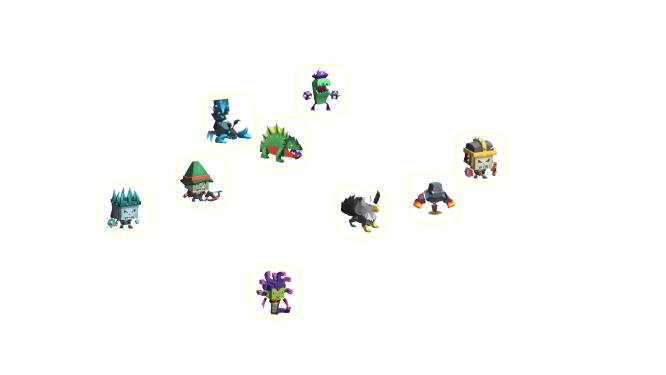
The following mobs spawn in the Dragon's Dungeon
The boss has a simple attack pattern - Every 10 seconds, it will execute a long range, wide cone, fire breath sweeping from side to side for 7-8 seconds. Alongside his breath attack, the boss spawns several short range AoE fire pillars.
Notice! - When Dragon starts his attack, anything summoned by your attack (like tentacles or Phantom's ghosts) will despawn.
Game Tips:
Life Steal - Set 1x purple stone in your offensive gear to heal while damaging the boss.
Poison - Set 1-2x green stone(s) in your offensive gear to stack poison and deal great amounts of DoT damage.
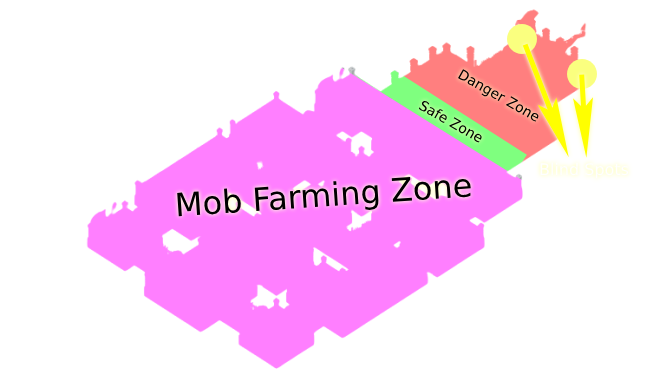
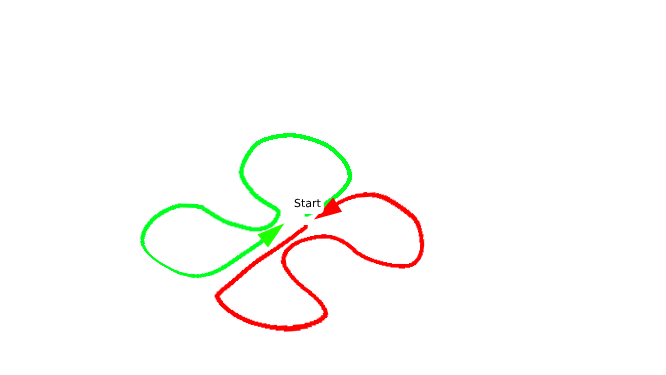
Blind Spots - The boss has 2 blind spots, right on the corners of the map (to each side of the boss). Depending on which direction the breath attack swings to, the other side will be safe to attack from. Click here to view blind spots.
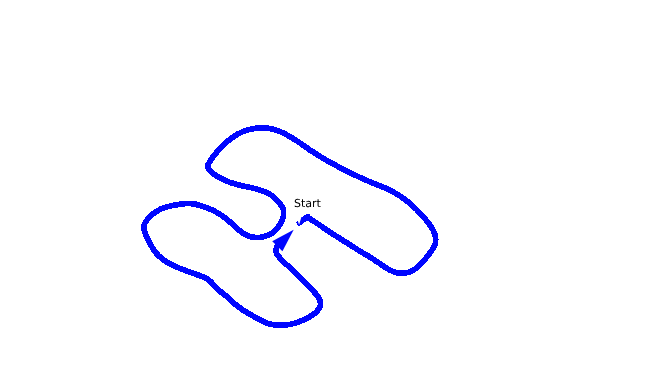
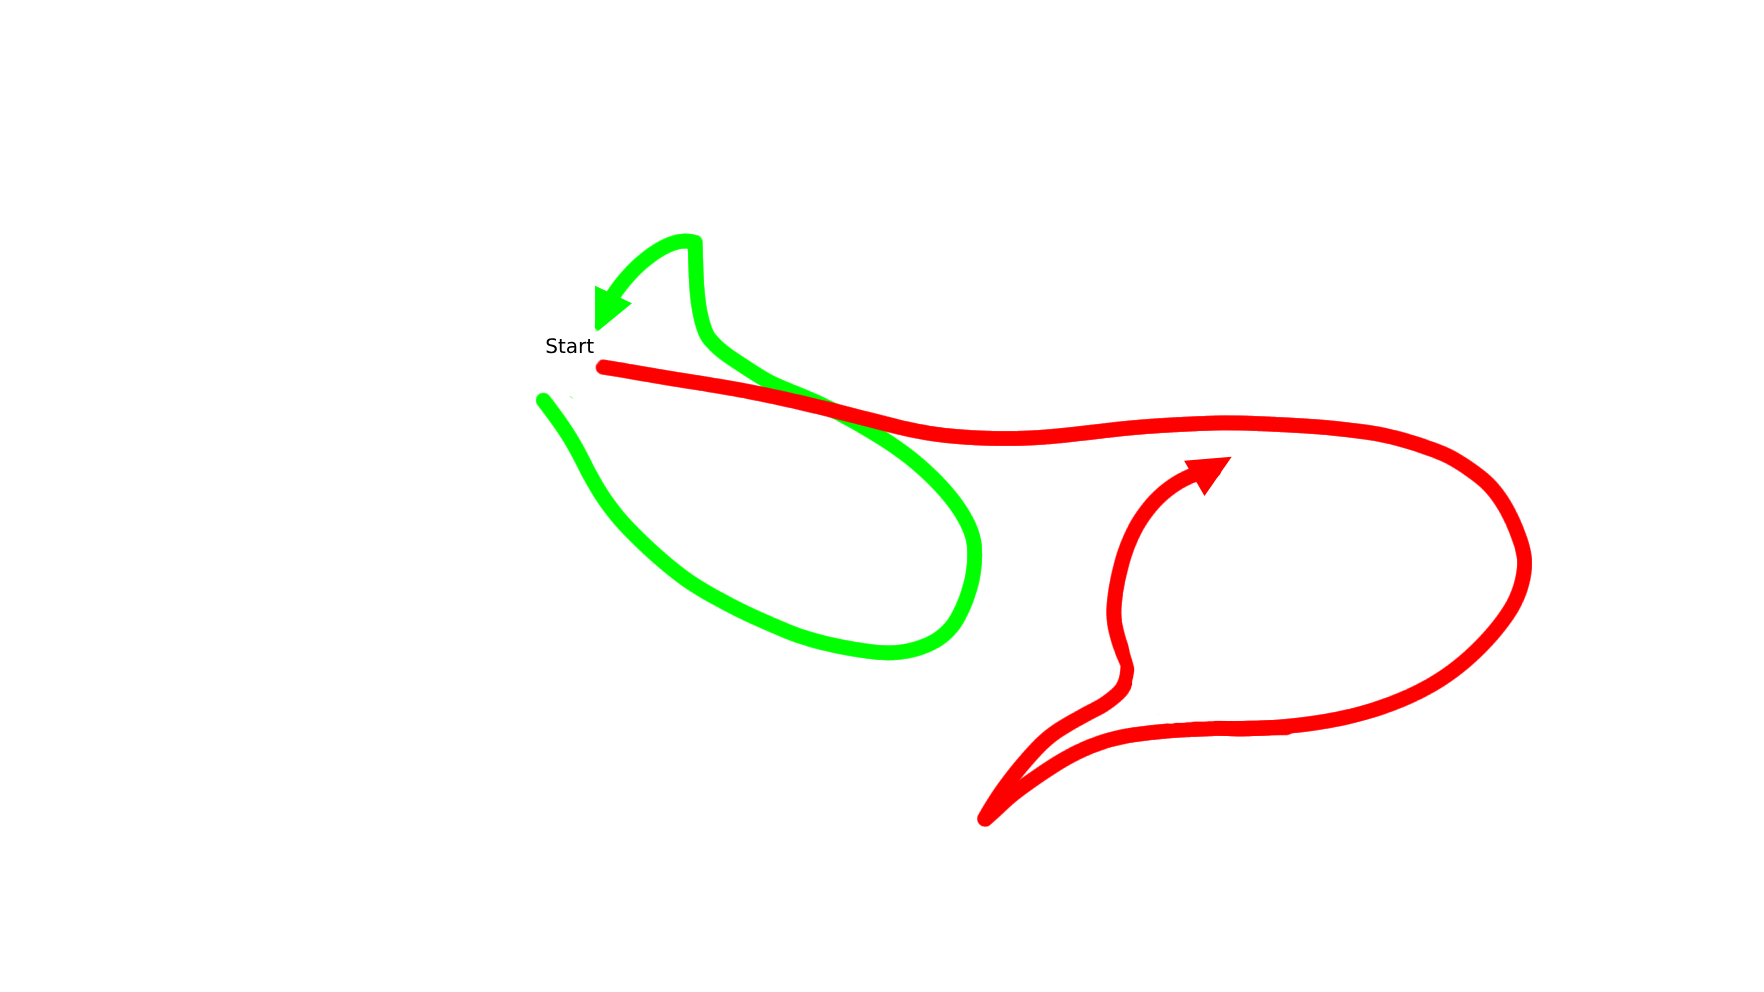
Pathing - To optimize your mob killing time, especially when playing with a duo, having the correct pathing is crucial! View solo/duo pathing guides.
No Life Drain - Life drain is basically your purple stone that heals you for a percentage of your damage dealt. On floors where mobs & boss are resistant to it, you want to prioritize hunters with Regen and/or Life Steal perks for healing.
Dragon's Dungeon
Floor Time, Boss HP & Rewards Table
Floor
Time
Boss HP
Rewards
1
4:00
100k
1011
2
4:00
140k
4055
3
3:40
200k
801010
4
3:40
280k
1201515
5
3:20
390k
1602020
6
3:20
500k
2002525
7
3:00
650k
2403030
8
3:00
850k
2803535
9
2:40
1mil
3204040
10
2:40
1.2mil
4005050
Floor Modifiers Table
Floor
Modifiers
Mob Stats
Boss Stats
1
250%
200%
40100%
2
250%
200%
40100%
3
250%None
---
40100%
4
125%
200%
40100%
5
250%
200%
40100%
6
250%None
---
40100%
7
250%None
100%
40100%
8
250%
200%
40100%
9
250%None
---
40100%
10
250%None
200%100%
40100%100%
Possible Drops
Dragon's Dungeon will drop 2 different kinds of items:
1. Power Stones (I will add exact drop chance per type when I have it).
2. Dragon Gear (I will add exact drop chance per type when I have it).
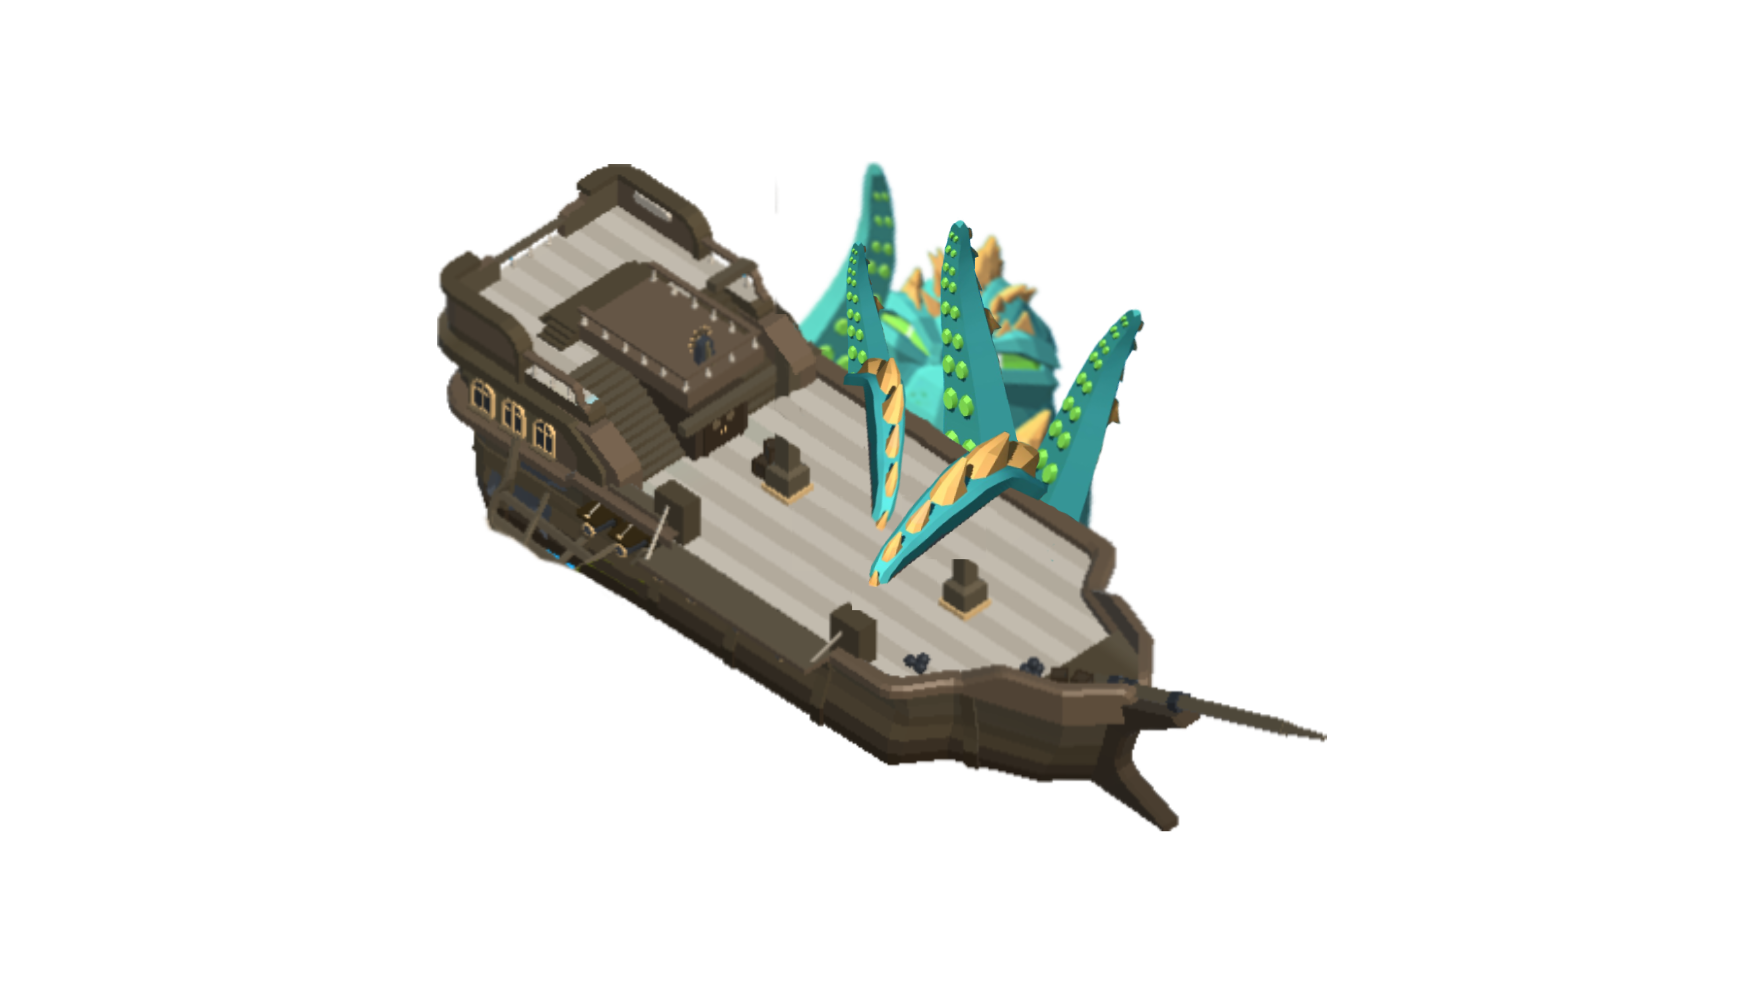
Kraken's Ship
About
Type
Dungeon
Gameplay
PvE
Modes
Solo/Duo
Floors
10
Requirements
Trophies
2,500
Gearscore
500
Other
—
Rewards
Trophies
600
Gems
5062
Tokens
170
Kraken's Ship
Description
Mobs
Boss
Tips
Collect wood and repair your ship. Once ship is repaired you will face the fearsome Kraken! Remember to use the ship's cannon! Once Kraken is defeated, go to the next difficulty level with a new hunter.
If you are wearing Epic gear, you can get Epic Gems.
The following mobs spawn in the Kraken's Ship map
Kraken attacks with his tentacles. It will continuously spawn tentacles at random positions on the map, and each tentacle will randomly slam on the deck to damage the player.
Game Tips:
Power Stones - Same as Dragon's Dungeon. You want to have life steal and poison stones in your offensive gear.
Cannon - As the fight with Kraken progresses, you will hit a point where there are too many tentacles to manouver, and you are hit a lot. To help, the game has designed the cannon. Pick up cannon balls from the ship (randomly spawn) and step to the cannon to shoot the Kraken and reset all his tentacles.
Important! - Cannon will only spawn if the ship's health status is above 80%, so collect wood from the map to fix the ship before proceeding to battle the Kraken.
Pathing - To optimize your mob killing time, especially when playing with a duo, having the correct pathing is crucial! View solo/duo pathing guides.
Time Management - The floor timer does not reset when proceeding to the boss fight, so track the clock and leave yourself enough time to battle the Kraken.
No Life Drain - Life drain is basically your purple stone that heals you for a percentage of your damage dealt. On floors where mobs & boss are resistant to it, you want to prioritize hunters with Regen and/or Life Steal perks for healing.
Kraken's Ship
Floor Time, Boss HP & Rewards Table
Floor
Time
Boss HP
Rewards
1
3:40
250k
1511
2
3:40
300k
6056
3
3:40
350k
1201012
4
3:20
450k
1801518
5
3:20
500k
2402024
6
3:00
600k
3002531
7
3:00
700k
3603037
8
2:40
800k
4203544
9
2:40
900k
4804050
10
2:40
1mil
6005062
Floor Modifiers Table
Floor
Modifiers
Mob Stats
Boss Stats
1
120%50%
40%
105100%
2
None50%
60%45%
120100%
3
120%45%
120%50%
135100%
4
90%45%
70%55%
150100%
5
None120%40%
150%60%
165100%
6
None120%40%
80%65%
180100%
7
None120%40%
100%85%70%
100%200100%
8
120%40%
180%80%
220100%
9
None120%40%
95%90%
240100%
10
None120%40%
100%200%
100%270100%
Possible Drops
Kraken's Ship will drop 2 different kinds of items:
1. Power Stones (I will add exact drop chance per type when I have it).
2. Kraken Gear (I will add exact drop chance per type when I have it).
Yeti's Tundra
About
Type
Dungeon
Gameplay
PvE
Modes
Solo/Duo
Floors
10
Requirements
Trophies
5,000
Gearscore
1,000
Other
—
Rewards
Trophies
800
Gems
5074
Tokens
200
Yeti's Tundra
Description
Mobs
Boss
Tips
Enter Yeti's Tundra and fight monsters until you get enough strength to face the spine-chillng Yeti. Once Yeti is defeated, go to the next difficulty level with a new hunter. Beware of ice traps!
If you are wearing Epic gear, you can get Epic Gems.
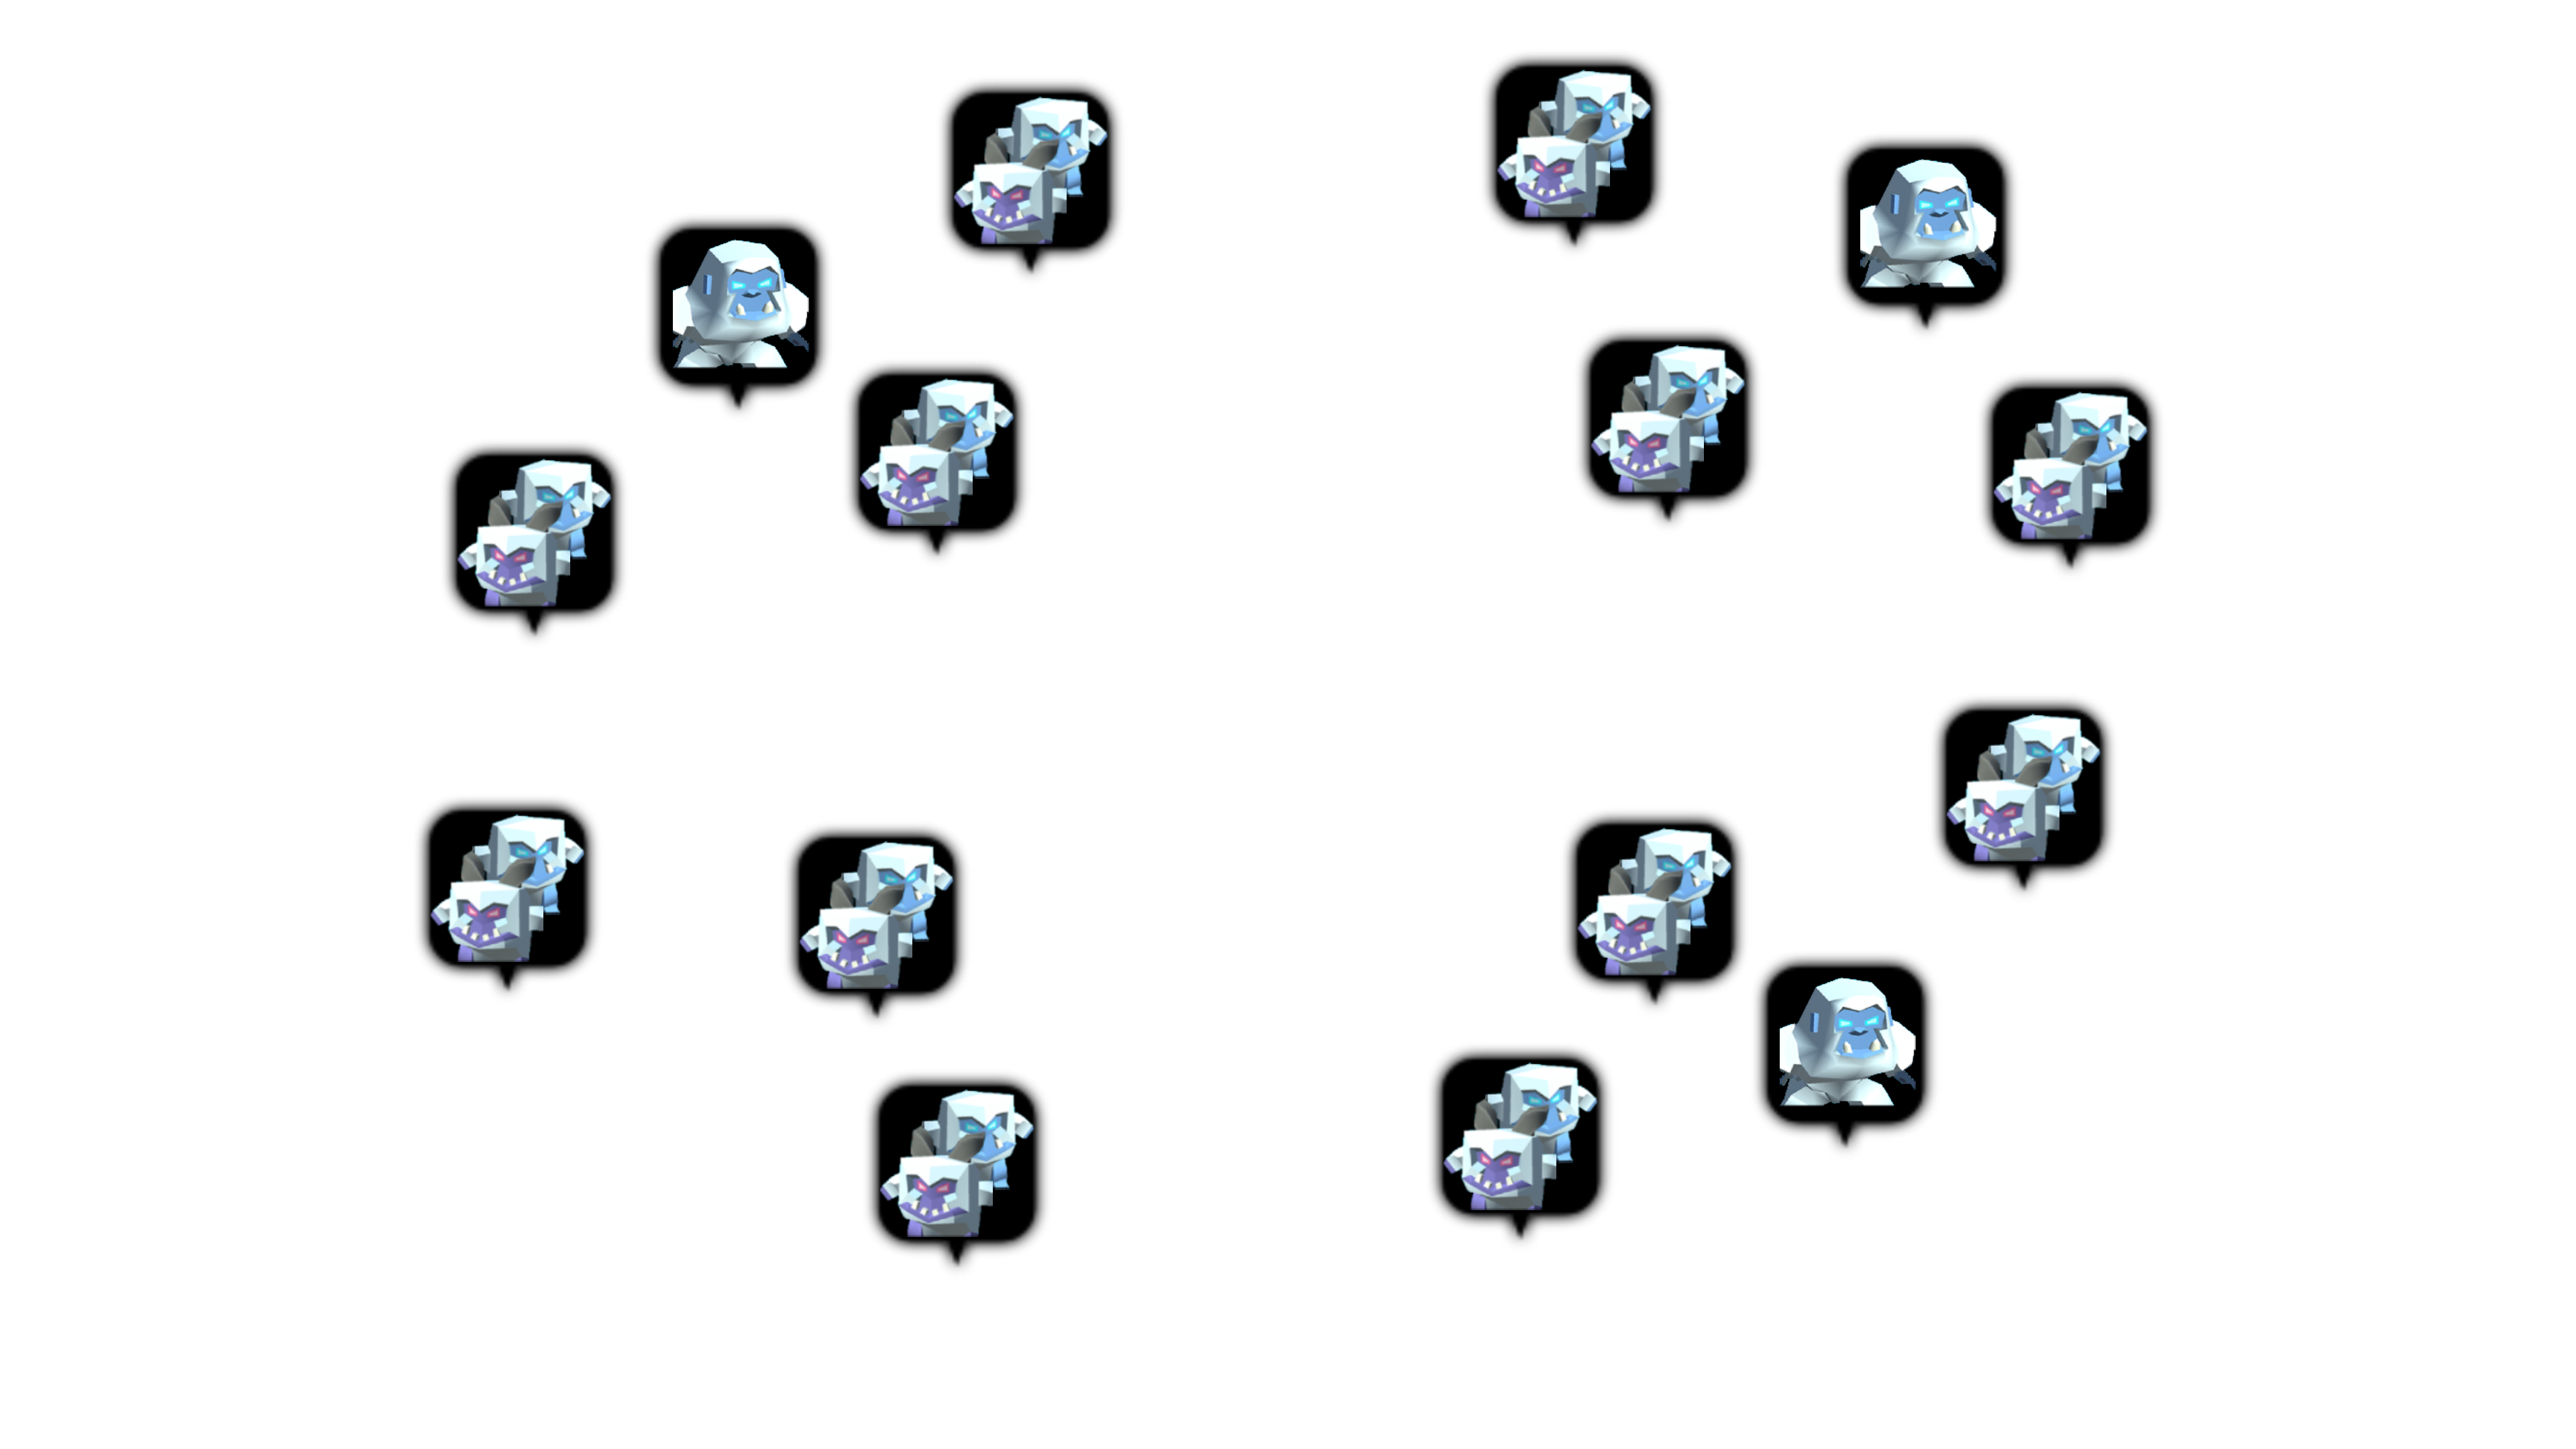
The following mobs spawn in Yeti's Tundra
Yeti's Tundra introduces us to new game mechanics. Yeti is the first mobile boss (not stuck in place), and the first boss that is not immune to stun (time to start thinking about dungeon specific builds). Also, we get introduced to book buffs!
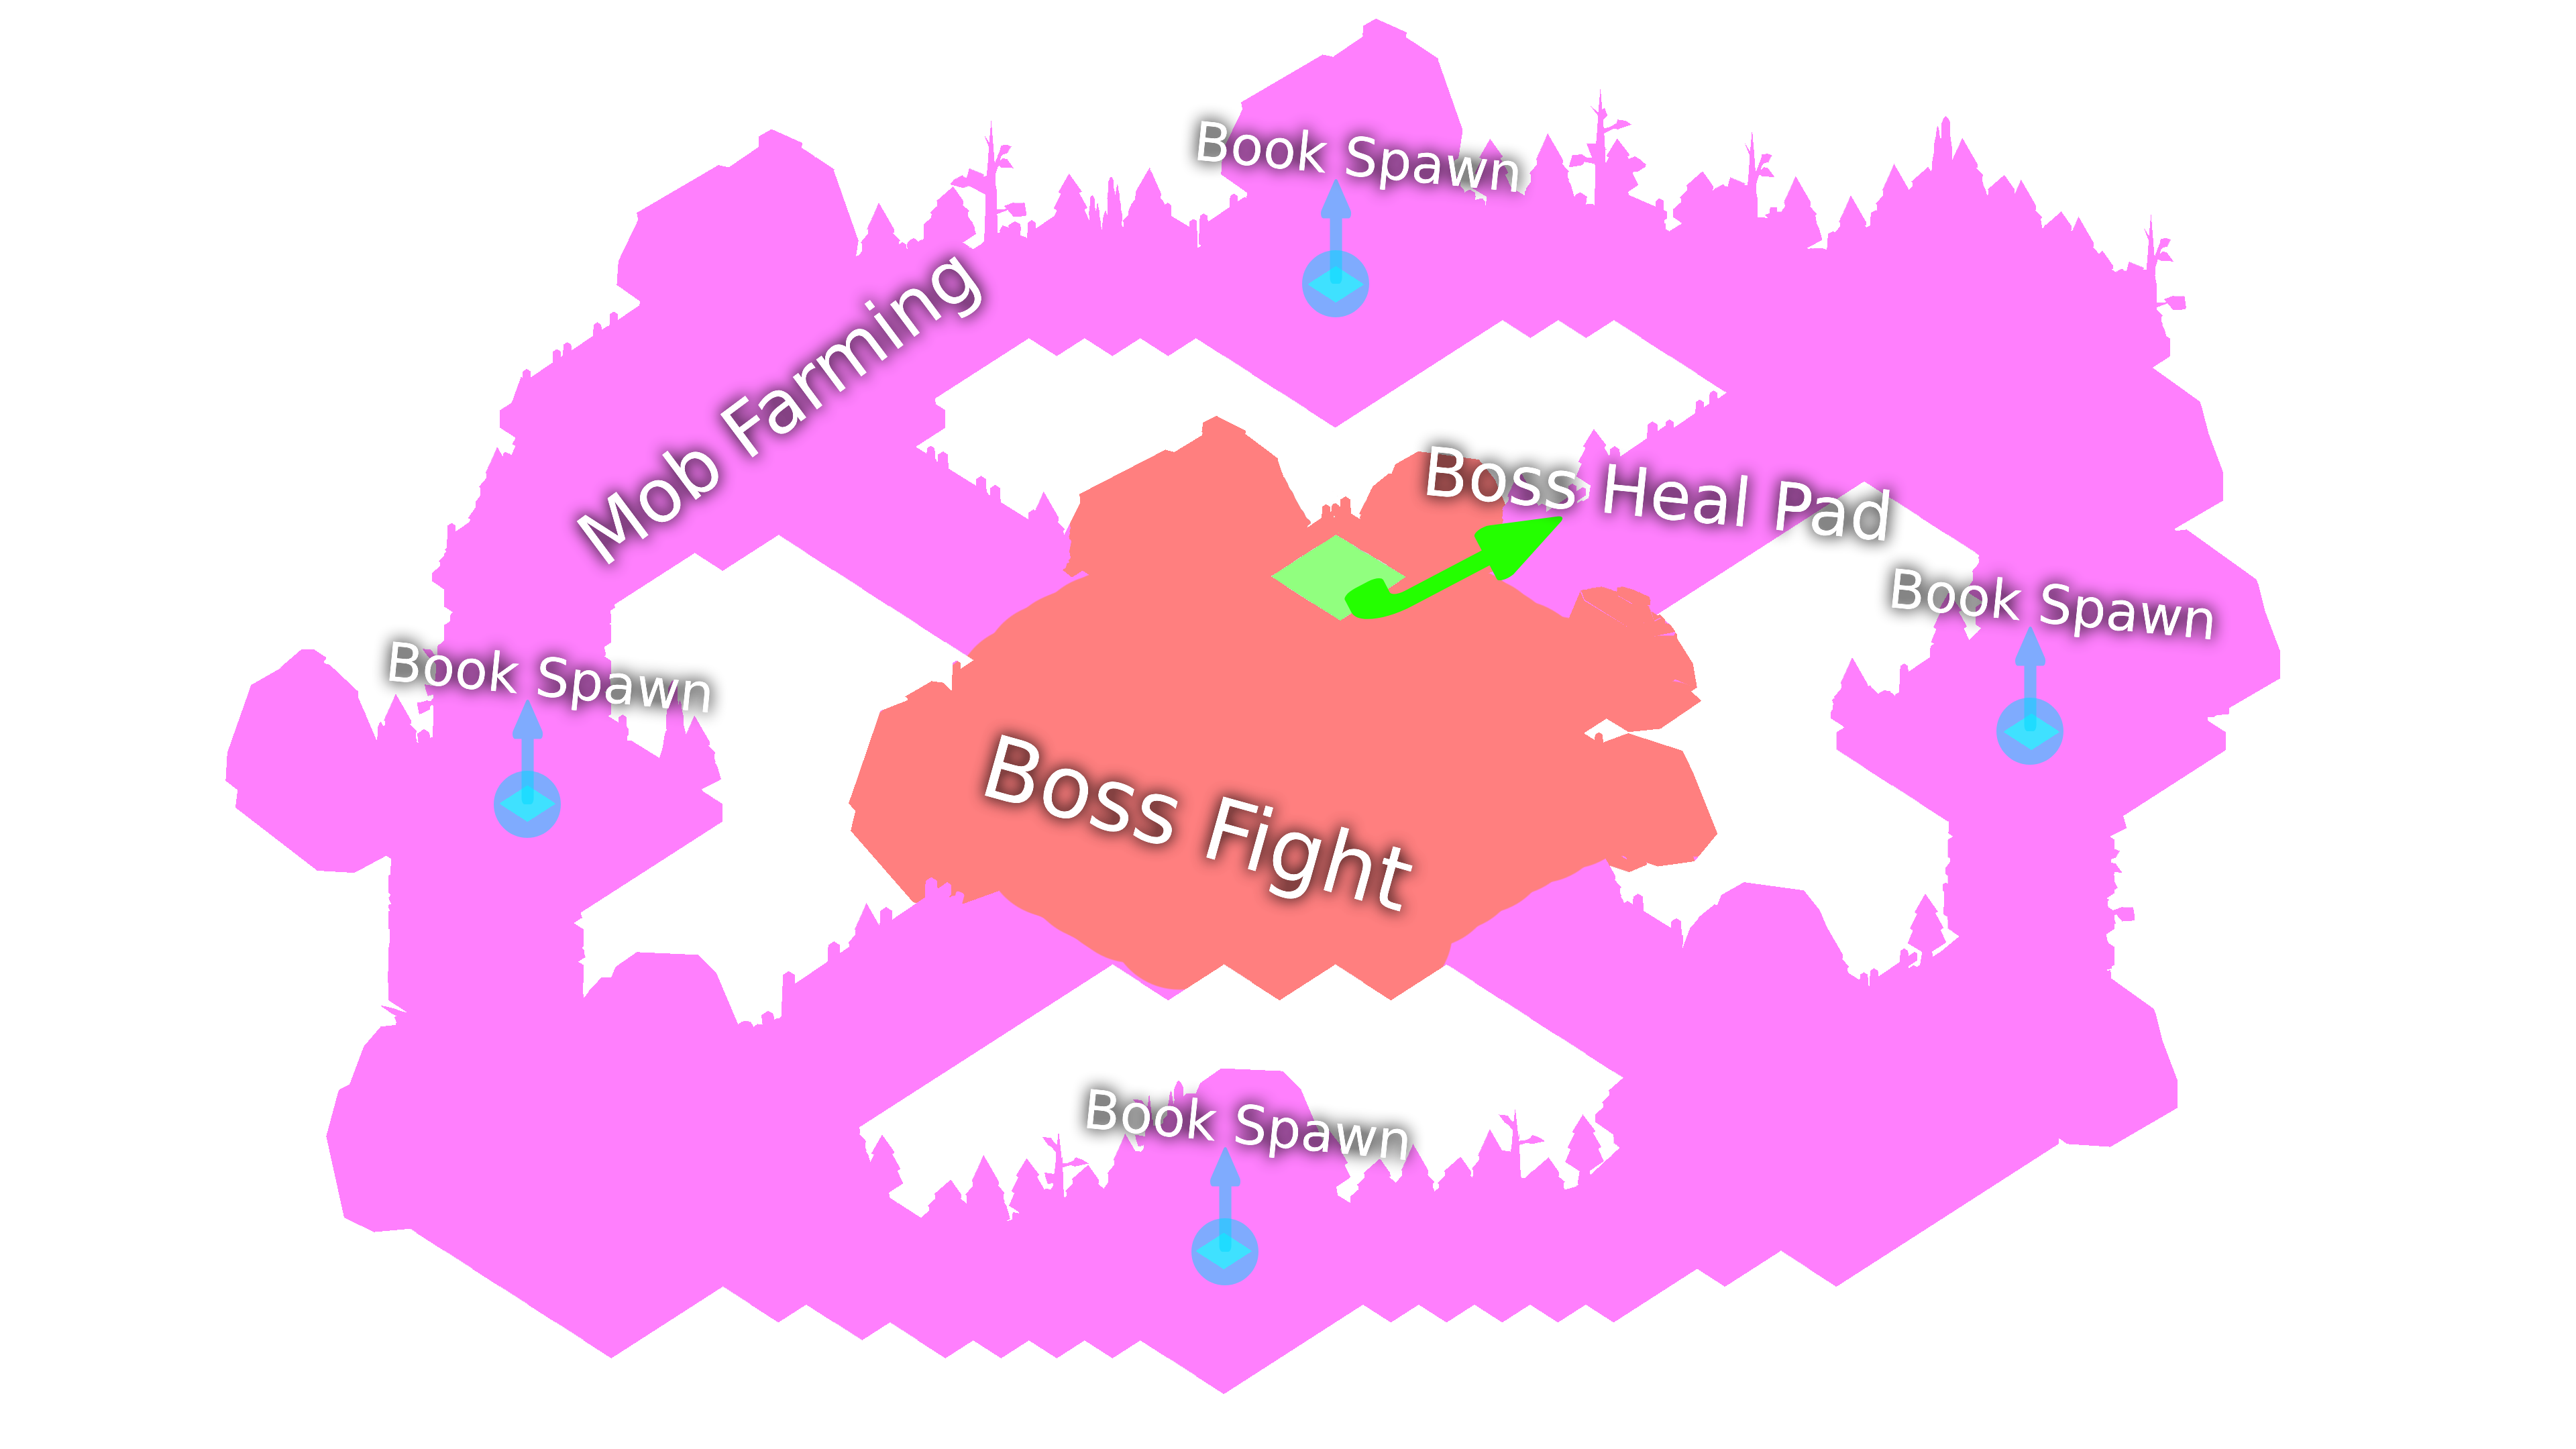
The Boss Fight happens within a restricted area. Yeti can't leave it. Map sections
If you thought you can use the restricted area to your advantage... You are, sadly, wrong! - When you leave the restricted area, Yeti will go to his healing pad and heal up to full in mere seconds!
Hint - This is where stun comes in to play! But stun alone is not enough...
Yeti's attack is simple. Just a short range AoE slam to the ground, BUT - Yeti also summons ice zones to the map that both slow you & damage you at the same time.
Game Tips:
Power Stones - Okay, now things start getting interesting! Keeping our same configuration from the previous dungeons (life steal and poison), it's time to introduce Stun and Tentacles. Yeti's Boss fight was designed to teach us to strategize better. With Yeti being susceptible to stun, and with stun chance being so low on low stone levels, we need to increase our chance to stun.. and how do we do that? With tentacles! - Set pearl stones in your defensive gear for stun chance and blue stones in your offensive gear for a chance to spawn tentacles (which will attack the boss 3 times). Tentacles gain all of your stats and status effects, so they will hit as hard as you do, apply poison, life steal, and have change to apply stun to the target!
Books - Power Books are a temporary buff that slightly increase your HP, AS, MS, and DMG. They are a great tool to gain that little bit of extra umph you need to farm mobs faster.
Pathing - Pathing on Yeti's Tundra is pretty self explanatory... it's a circle after all.. As the monsters are getting stronger, and early gear progression is slow - it is generally recommended to farm together as a duo, so we will only have one pathing guide this time. Feel free to split up in different directions if you are confident enough to solo farm.
No Life Drain - Life drain is basically your purple stone that heals you for a percentage of your damage dealt. On floors where mobs & boss are resistant to it, you want to prioritize hunters with Regen and/or Life Steal perks for healing.
Yeti's Tundra
Floor Time, Boss HP & Rewards Table
Floor
Time
Boss HP
Rewards
1
3:40
300k
2012
2
3:40
350k
8058
3
3:40
450k
1601014
4
3:20
550k
2401522
5
3:20
700k
3202029
6
3:20
850k
4002537
7
3:00
1mil
4803045
8
3:00
1.2mil
5603553
9
2:40
1.4mil
6404060
10
2:40
1.5mil
8005074
Floor Modifiers Table
Floor
Modifiers
Mob Stats
Boss Stats
1
120%
65%30%
90
2
120%
70%35%
100
3
None120%
100%50%40%
100%110
4
90%
45%45%
120
5
120%
50%
130
6
None120%
100%55%55%
100%140
7
120%
120%60%
150
8
120%
65%65%
160
9
None120%
70%70%
170
10
None120%
100%70%70%
100%180
Possible Drops
Yeti's Tundra will drop 2 different kinds of items:
1. Power Stones (I will add exact drop chance per type when I have it).
2. Yeti Gear (I will add exact drop chance per type when I have it).